Secure Payments
10% Discount on 3+ Patterns
Secure Payments
Your card information will not be stored on our servers
10% Discount on 3+ Patterns
Buy 3 or more patterns for a 10% discount
Immediate Download
Immediate & unlimited downloads
Your card information will not be stored on our servers
Buy 3 or more patterns for a 10% discount
Immediate & unlimited downloads

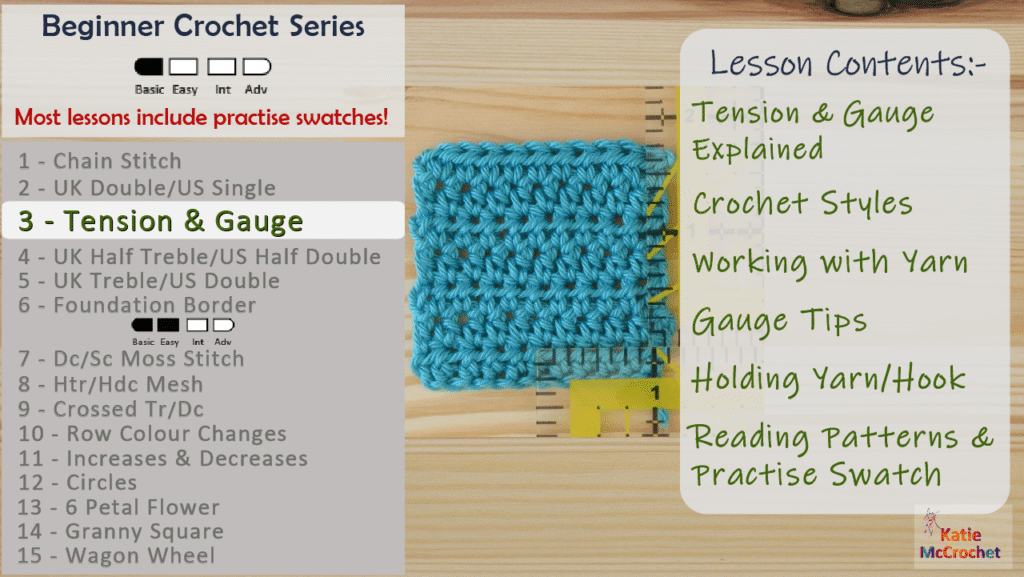
Welcome to Lesson 3 of the Beginner Crochet Series!
Todays crochet tutorial is aimed at helping you to understand crochet tension & gauge.
I’ll explain crochet styles, show crochet grip techniques and yarn wrapping styles, along with yarn control techniques. I’ll aslo cover what crochet gauge is and why it matters. You’ll learn how to check crochet gauge and tips on how to match it.
At the end of the tutorial is a chart and practice gauge swatch to help you understand crochet tension & gauge thoroughly.
“If I were able to leave you with only one piece of crochet advice, it would be to always have fun. Learn the basics, but then just go crazy with your crafty self!” -Twinkie Chan
Tension refers to the height of crochet stitches and how tight or loose they are . It affects the density of your crochet fabric and the height and width of your project.
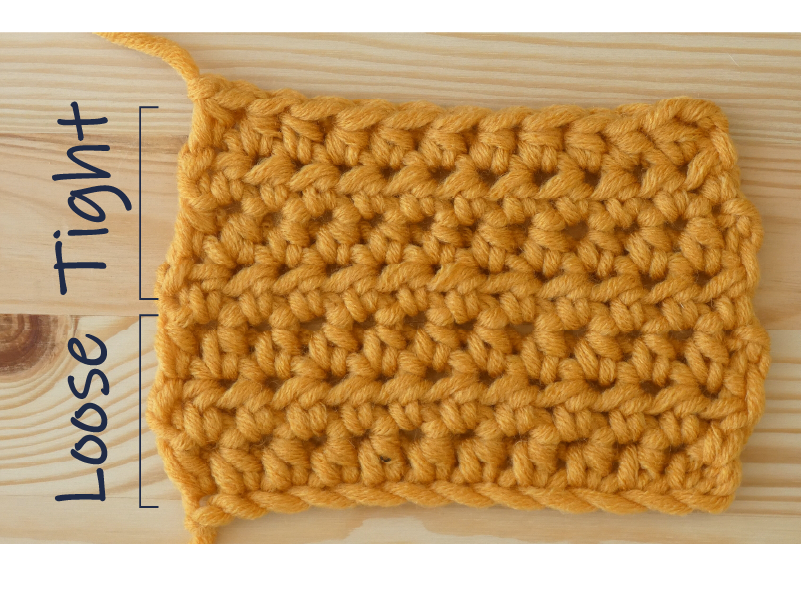
I changed my tension throughout this swatch.
The bottom is wider and the stitches are looser for the first three rows.
As I tighten my tension, the width gets smaller and the stitch is more compact.
Good tension and consistency produces clean and even crochet pieces. In this beginner guide to crochet tension, you’ll learn what influences and how to improve tension.
Gaining even tension in crochet is partly controlled by how the yarn flows from the ball and through the yarn wrapped around your hand. The yarn should flow smoothly whilst crocheting, to stop the stitches from getting too tight.
The first step in controlling the yarn flow to your hook, is having enough yarn pulled from the ball or skein. The pulled yarn is known as ‘slack’.
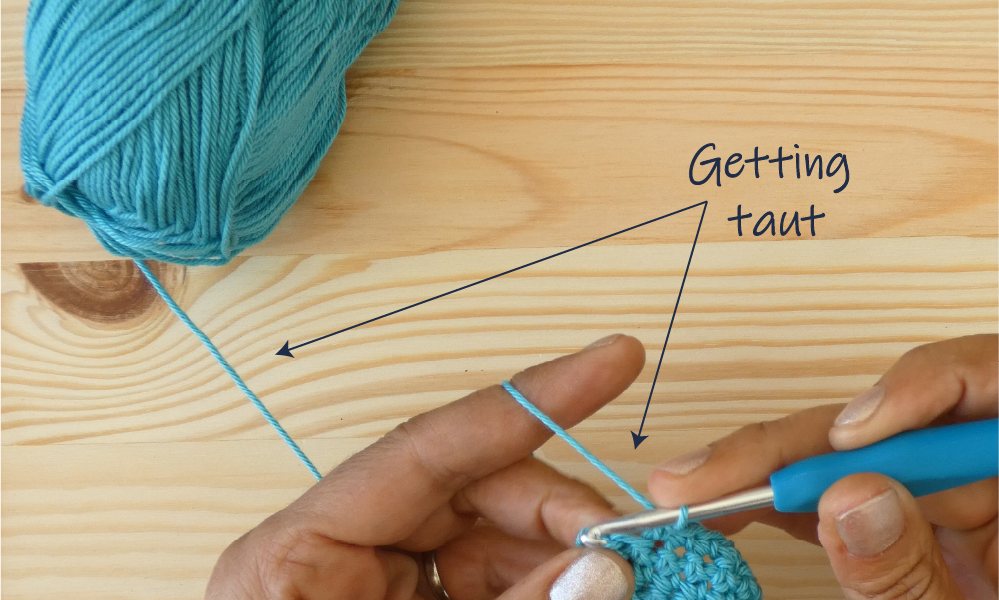
As the slack is used up, the yarn over the tension finger gets tighter. The ball starts to act as a weight and the yarn isn’t flowing well.
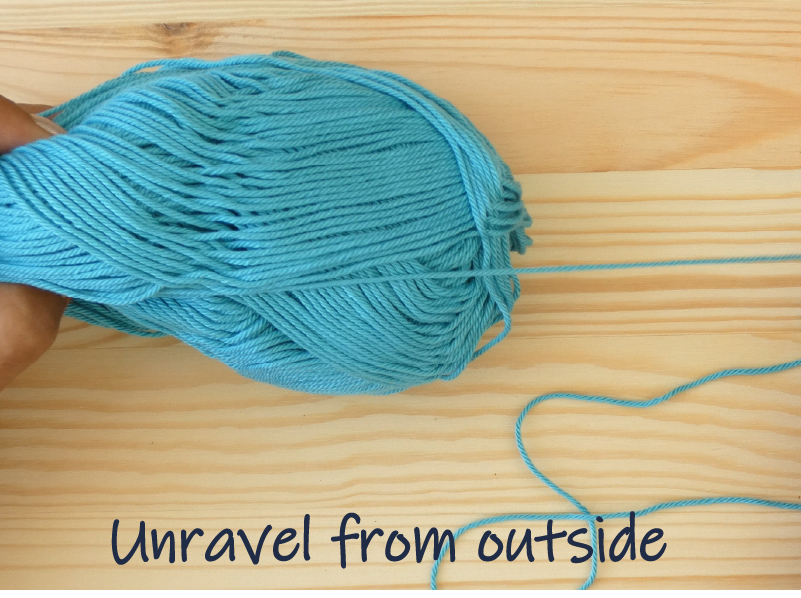
You can unravel your yarn from the outside, which is what I prefer.
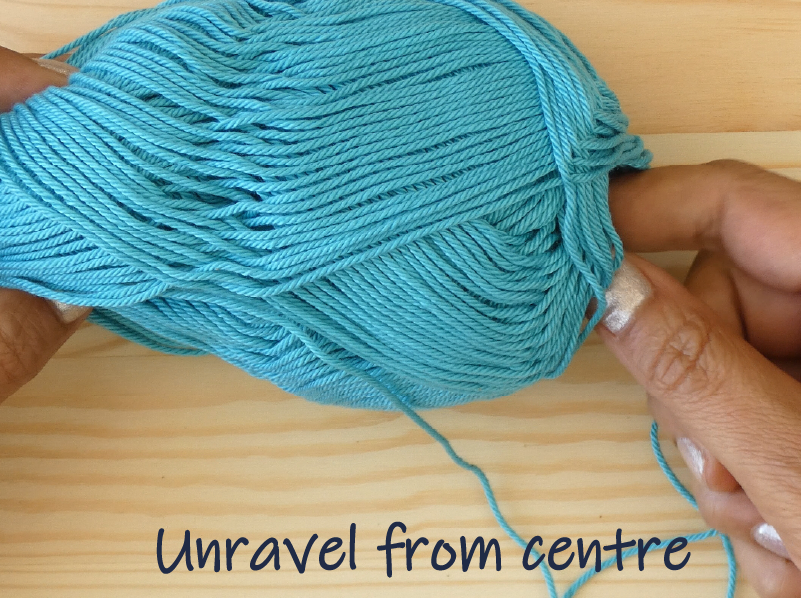
Some pull it from the centre. I find this method has more tangles.
To stop the yarn rolling all over the place, some people use yarn bowls.
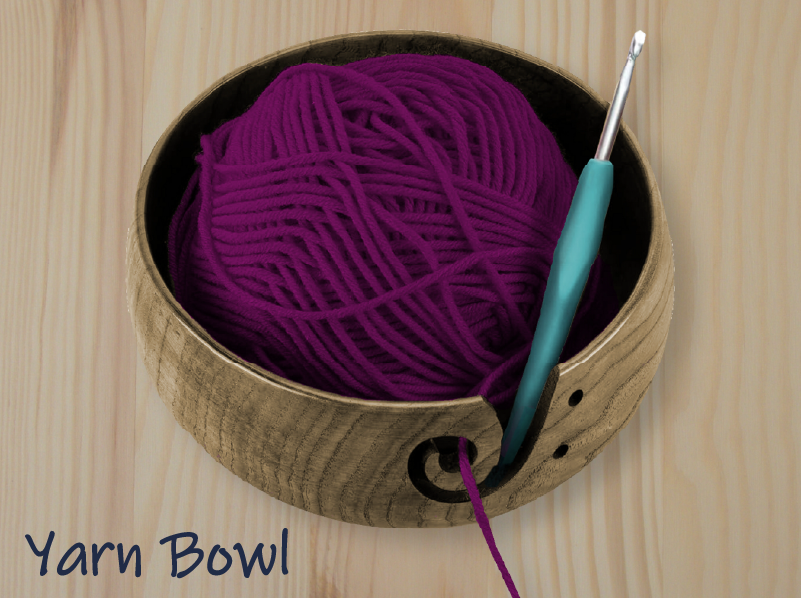
Or you can make your own out of a shoe box with a hole in the lid!
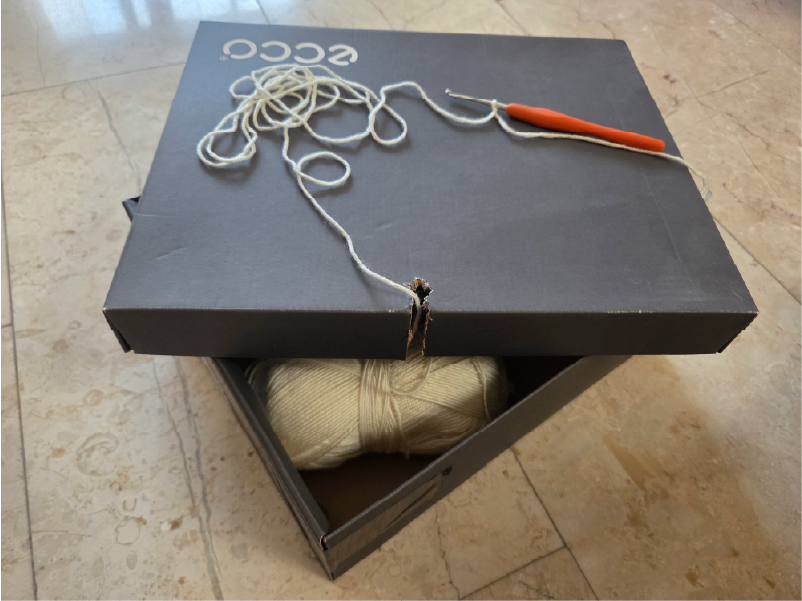
There’s a whole range of yarn bowls and holders. If you use one, let me know in the comments!
The next step in nailing crochet tension is the flow through the hand that holds the yarn. How yarn is wrapped around your hand will affect how smoothly the yarn flows as you make crochet stitches.

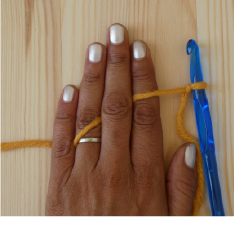
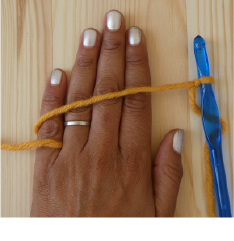
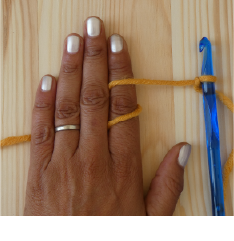
In general, these yarn wrapping styles, have the index finger controlling how the yarn is delivered to your hook. Try and experiment with how to hold the yarn for better crochet tension.
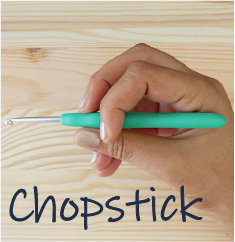
How a crochet hook is held will also influence the yarn flow. Below are some of the more common methods of holding a hook, such as the knife and pencil hold.
Again, one size doesn’t fit it all, so play around and find which crochet hold you prefer – let me know in the comments please!
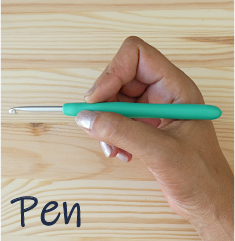
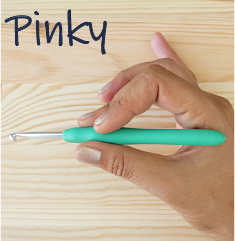
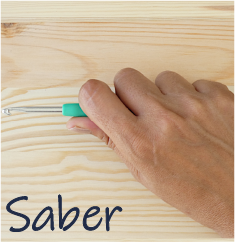
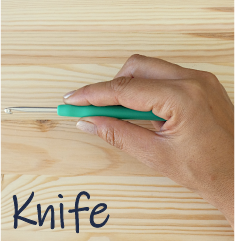

Crochet styles refer to how high you lift the crochet hook when making stitches.
The different crochet styles are known as Yanker, Rider and Lifter.
These swatches are all made with the same size hook. They all have the same amount of stitches and rows, but are different sizes. This is down to the style of crocheting, which is determined by the ‘golden loop’.
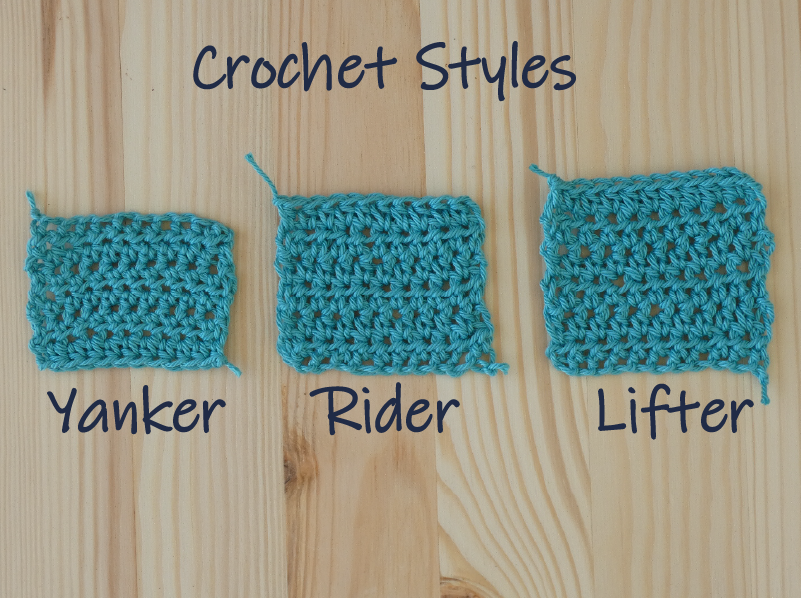
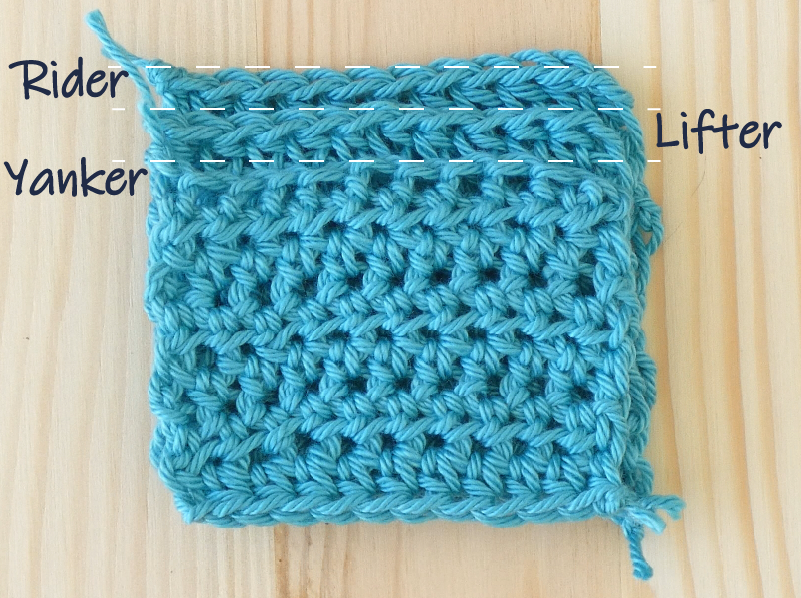
The golden loop is the loop created when you pull the yarn back through the stitch. It can be made bigger or smaller, depending on your slack and hook position.

The yanker style creates the tightest stitches.
The golden loop is smaller than the loop on the hook, and the stitich below is getting pulled up.
This is usually caused by yanking back the yarn with your tension finger.
You can fix this by checking you have enough slack and bringing your hook up a little more

With the rider crochet style the hook shaft is parallel to the work and sits on top of the stitches.
The golden loop is level with the loop on the hook and the stitch below isn’t getting pulled up as much.
This is the ideal style to aim for.

The lifter style is when the golden loop becomes longer.
This can be caused by lifting the hook higher than the loop on the hook, or the yarn flowing too freely over your tension finger.
 The yanker style creates the tightest stitches.
The golden loop is smaller than the loop on the hook, and the stitich below is getting pulled up.
This is usually caused by yanking back the yarn with your tension finger.
You can fix this by checking you have enough slack and bringing your hook up a little more
 With the rider crochet style the hook shaft is parallel to the work and sits on top of the stitches.
The golden loop is level with the loop on the hook and the stitch below isn’t getting pulled up as much.
This is the ideal style to aim for.
 The lifter style is when the golden loop becomes longer.
This can be caused by lifting the hook higher than the loop on the hook, or the yarn flowing too freely over your tension finger.
You can see here how the stitch height increases with each style.
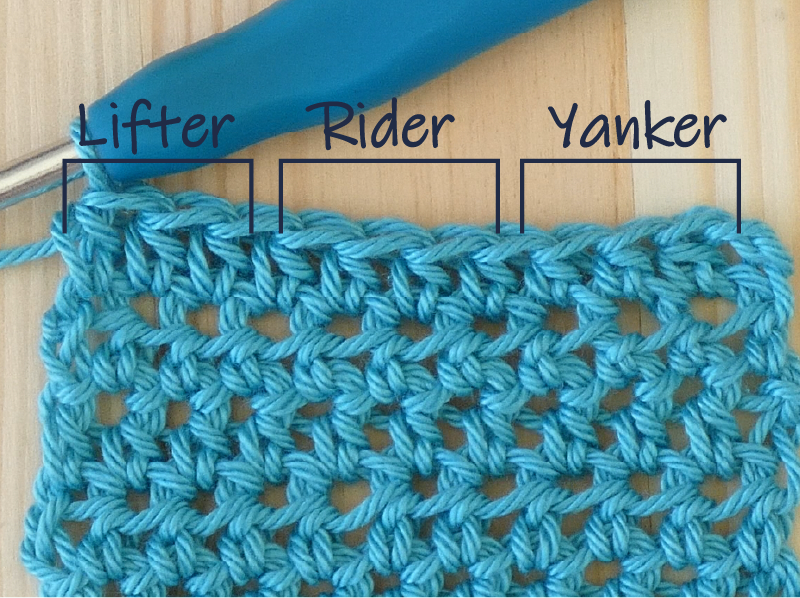
The perfect crochet style is the rider as it’s not to high or too low. For those that fall into the other categories, try to get in the habit of positioning your hook parallel, and sitting on top of your crochet stitches.
You’ve worked on your tension but your work still looks like one of the examples below. This could be because the tension you use whilst making the chain could be different to when you start making the stitches.
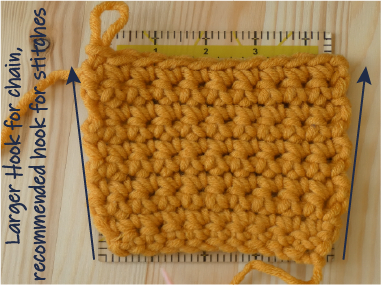
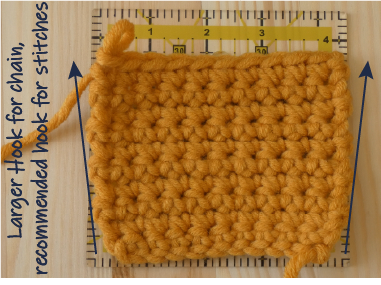
If you’re using the recommended hook size but your work slants out, then make the chain with the next hook size up before using the correct size for the stitches.
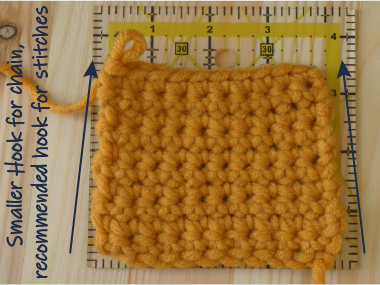
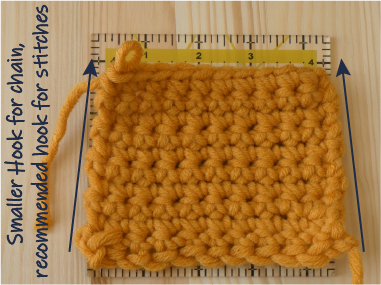
If your work slants in from the base, then try making your chain with the next hook size down and change to the correct size for the stitches.
Gauge refers to how many stitches and rows there are per inch. These measurements are used in patterns to ensure that your project ends up the same size as the designers. If the gauge isn’t matched between the crochet pattern and your item, the result could be a larger or smaller piece and possibly more yarn used – which can be expensive! As you can see – crochet gauge matters!
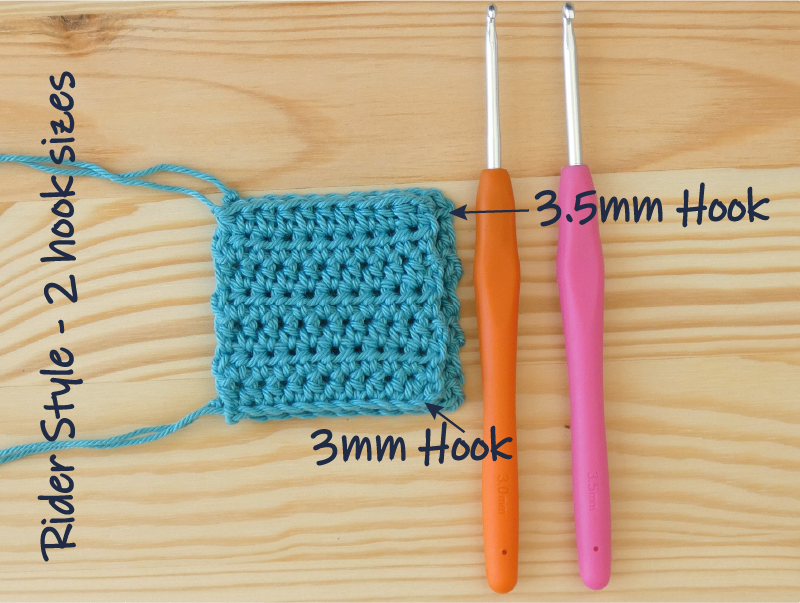
These two swatches are made with rider tension, but different size hooks.
They’re pretty much the same height, but the width is different.
Before embarking on a project it’s a good idea to make a small swatch to check your gauge – it’s simple, and all you need is a ruler!
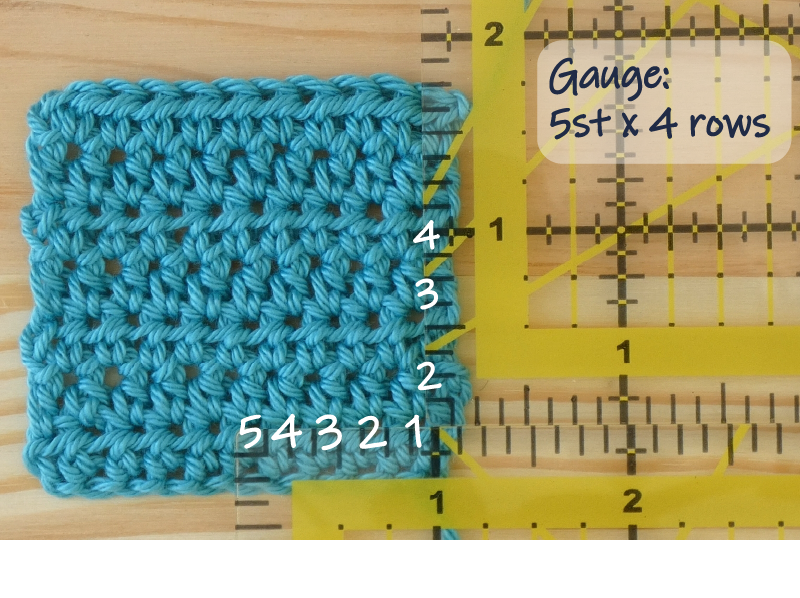
To measure how many stitches are in your piece, place the ruler horizontally, lining the inch mark up with the edge of a stitch – not the edge of the work. Count how many stitches fall within the 1 inch measurement.
To measure rows, it’s the same, but lay the ruler vertically, and count how many rows fall within the inch marks.
We’ve covered the importance of matching crochet gauge when following a pattern and how crochet tension contributes to stitch sizes. Crochet hook size also influences the gauge.
For this gauge swatch I was trying to achieve a gauge of 6 stitches and 4 rows per inch with a 3.5mm hook. However, this resulted in a gauge of 4 rows and only 5 stitches per inch.
I changed my hook size down to a 3mm hook and was able to get the right gauge.
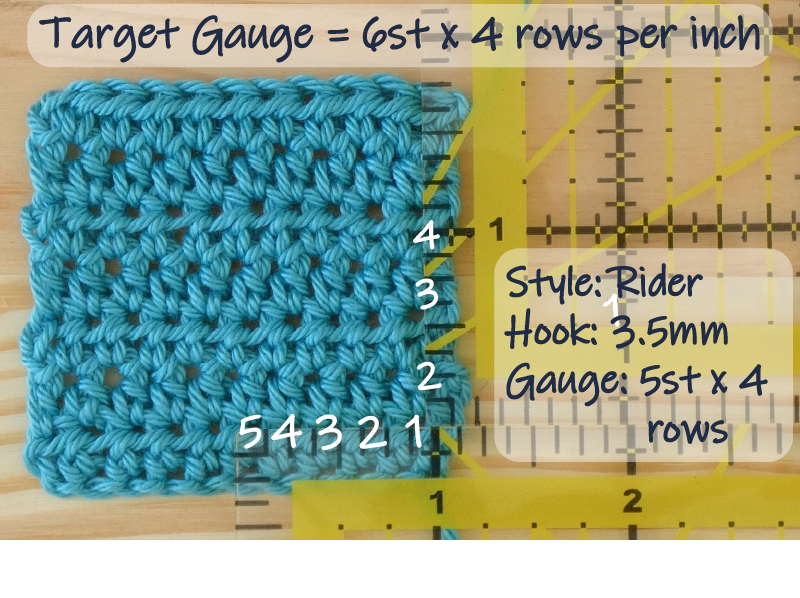
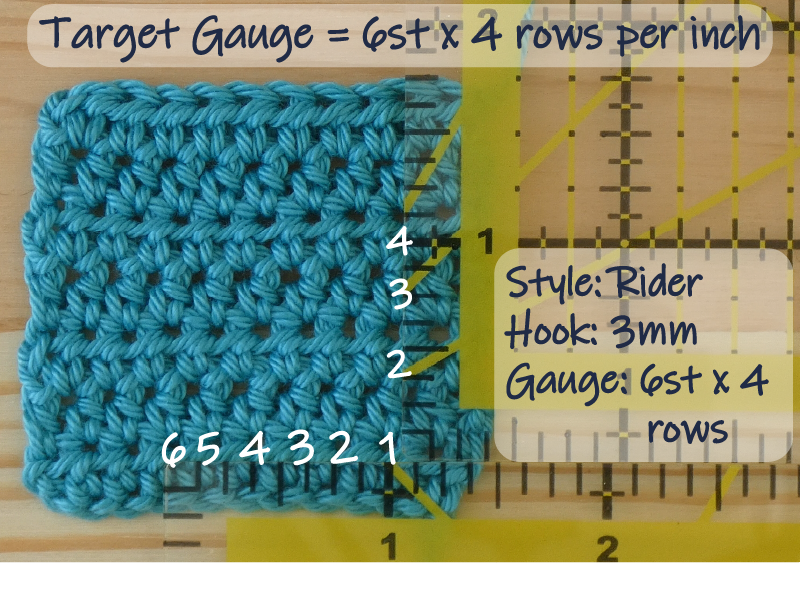
So to recap on crochet tension vs gauge
Crochet Gauge is the amount of rows and stitches within a specified measurement.
Crochet Tension affects the density, width and height of your project, which is determined by your yarn flow and crochet style.
This table shows how to identify your gauge problem and how to match with a crochet gauge.
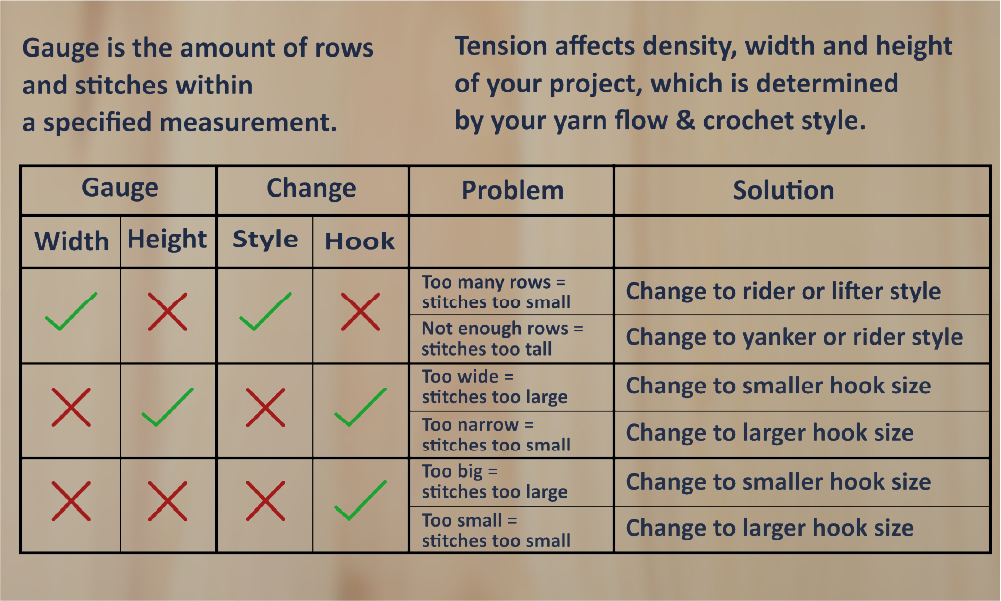
Row 1 – If your swatch has the right gauge for width, but not for height, you need adjust your crochet style, depending on if there are too many or too little rows for the height.
Row 2 – If the swatch is the right height, but too wide or not wide enough, then you need to keep the same tension, but change your hook size. Change to a smaller hook if it’s too wide and a larger hook if it’s too narrow.
Row 3 – If both width and height are too big or too small, then you need to change your hook size.
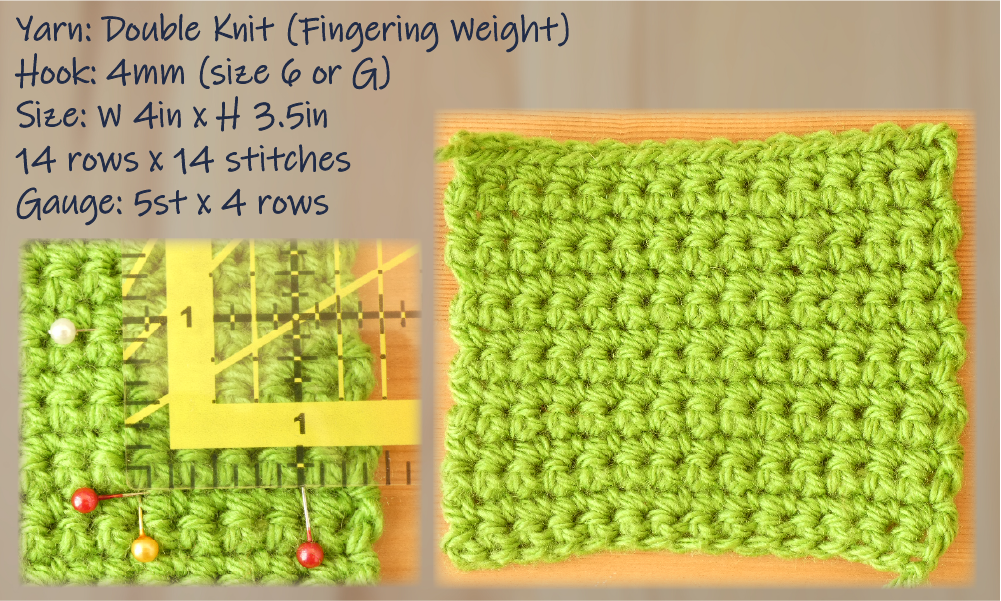
If you want to practice your crochet tension, see if you can match this swatch from lesson 2.
It’s made with a double knit acrylic yarn with a 4mm hook. I think in the US this is a fingering weight yarn and a size 6 or G hook.
 I hope this tutorial has helped you understand tension and gauge. Hopefully the information can help you improve crochet tension and get the right gauge!
In the next lesson you can learn the half treble (half double) crochet stitch.
We’ll also continue to learn how to read crochet patterns by making a practice swatch!

I hope this tutorial has helped you understand tension and gauge. Hopefully the information can help you improve crochet tension and get the right gauge!
In the next lesson you can learn the half treble (half double) crochet stitch.
We’ll also continue to learn how to read crochet patterns by making a practice swatch!
Welcome!
My name’s Katie and I’m a crochet addict!
I learnt to crochet about 20 years ago whilst living in Ireland. I soon had a street stall selling my crochet hats and bags, eventually progressing to organising craft fairs.
I returned to street selling for a few years to fund my travels around Latin America, before settling down and becoming a mum to two cool kids.
I love working with colour and creating vibrant, detailed crochet and wanted to translate that into patterns.
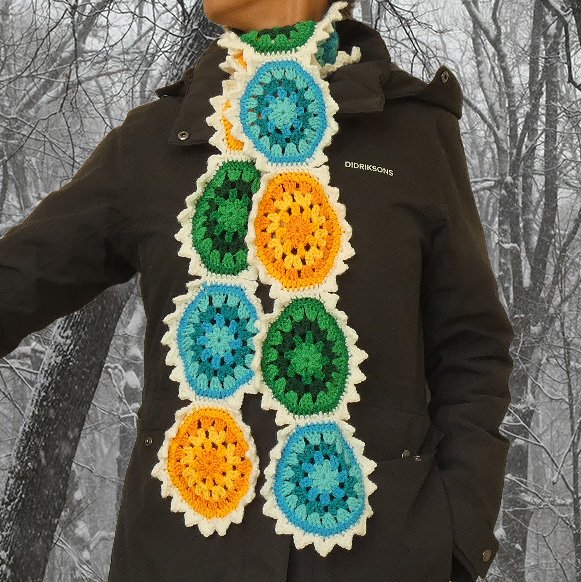
Free Crochet Scarf Pattern – Wagon Wheel
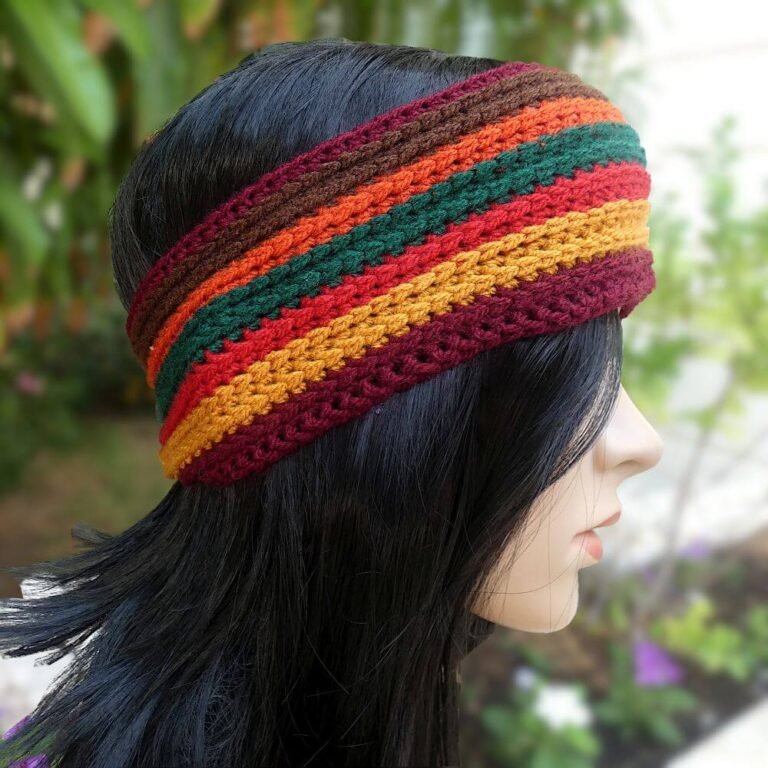
Crochet Ear Warmer Pattern
Crochet Short Scarf Pattern
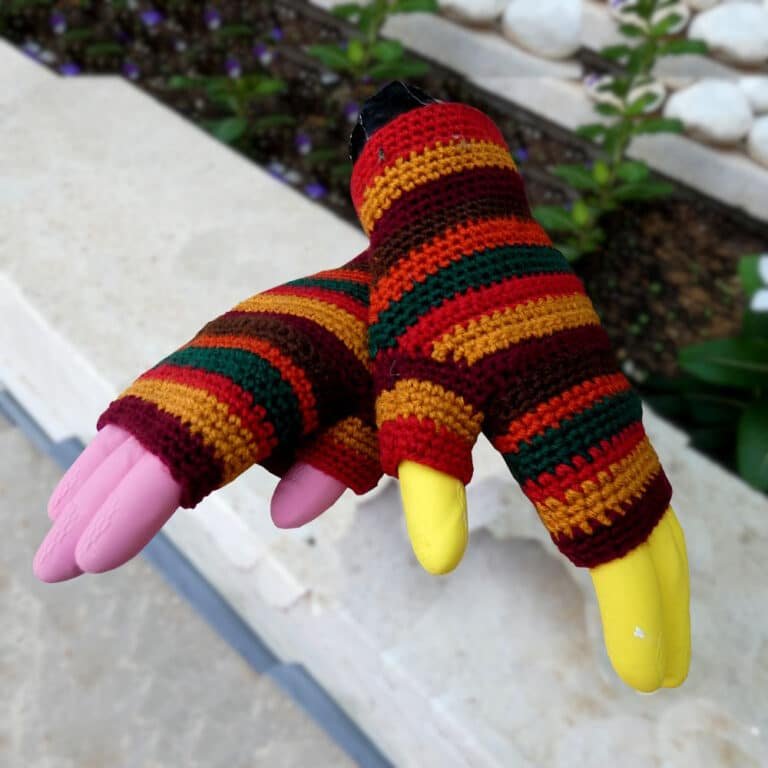
Crochet Fingerless Gloves Pattern